Guides


These instructions assume using Gentoo and Nginx 1.9.4 is being installed. Note, pretty much installs itself.
emerge -vDuNtp www-servers/nginx
/etc/portage/package.usewww-servers/nginx +fastcgi
emerge -vDuN www-servers/nginx
cd /etc/nginx

cp nginx.conf nginx.conf.original
/etc/nginx/nginx.conf# listen 127.0.0.1;
listen      80;
server_name example.org www.example.org;
Note two log files will be created for the server.
/etc/nginx/nginx.confroot /var/www/localhost/htdocs;
Create a simple file, or elaborate if desired, named "index.html" and place it in the server's documents' root directory
echo "Hello World, from nginx!" > /var/www/localhost/htdocs/index.html
/etc/init.d/nginx start
To restart nginx after a configuration change:
/etc/init.d/nginx restart
To run nginx as a daemon with openrc:
rc-update add nginx default
links http://localhost
These instructions assume Debian 7.0 is used, Nginx 1.2.1 was installed following above instructions, and Mapserver 6.0.1 is being installed.
emerge -vDuNtp mapserver
Edit your package.use file for desired USE flags(unnecessary for demo), and then complete install:
emerge -vDuN mapserver
tar -xvzf mapserver-7-0-0.tar.gz

cd mapserver-7.0

mkdir build

cd build

cmake ..

make
There may be errors requiring adjustments, like including where your local glib 2 files are.
cd ..

rm -r build/*

nano CMakeLists.txt
To add the missing glib 2 paths, near the top of CMakeLists.txt just below the "include_directories" lines, add the following with adjustments for the paths on your system.
CMakeLists.txtinclude_directories(/usr/include/glib-2.0)
include_directories(/usr/lib64/glib-2.0/include)
Try making mapserver again:
cd build

cmake ..

make
If it works this time, then install (default to /usr/local/).
make install
mapserv -v
/var/www/localhost/mapserver/shapefile.mapMAP
	NAME "world"
	STATUS ON
	SIZE 600 400
	EXTENT -180 -90 180 90
	IMAGECOLOR 255 255 255
	#
	# Start of layer definitions
	#
	LAYER
		NAME "world_nations"
		DATA ne_110m_admin_0_boundary_lines_land
		STATUS DEFAULT
		TYPE LINE
		CLASS
			NAME 'The World'
			STYLE
				OUTLINECOLOR 0 0 0
			END # STYLE
		END # CLASS
	END # LAYER
END # MAP
With line-by-line commenting:
/var/www/localhost/mapserver/shapefile.mapMAP
	NAME "world" # unimportant for now
	STATUS ON # do show map
	SIZE 600 400 # size of image to output
	EXTENT -180 -90 180 90 # bounaries of source data. For this shapefile it is in degrees
	IMAGECOLOR 255 255 255 # colour of image, excluding lines
	#
	# Start of layer definitions
	#
	LAYER
		NAME "world_nations" # unimportant for now
		DATA ne_110m_admin_0_boundary_lines_land # filename shared by the 3 shapefile files, without the extensions
		STATUS DEFAULT # "DEFAULT" outputs image, "ON" and "OFF" tend to give blank image
		TYPE LINE # !!!! shape type used in shapefile. For Polygon type, TYPE POLYGON. Using a less complex shape TYPE than used will work, like using LINE instead of POLYGON
		CLASS
			NAME 'The World' # unimportant for now
			STYLE
				OUTLINECOLOR 0 0 0 # colour of lines on the map, like national borders
			END # STYLE
		END # CLASS
	END # LAYER
END # MAP
mapserv -nh "QUERY_STRING=map=/var/www/localhost/mapserver/shapefile.map&mode=map" > maptest.png
Open the maptest.png file to verify the map lines are visible. If the national land borders shapefile suggested was used, then all land borders should be visible, but no coastlines.
emerge -vDuNtp spawn-fcgi
And then to install:
emerge -vDuN spawn-fcgi
cd /etc/init.d

ln -s spawn-fcgi spawn-fcgi.mapserv
cd /etc/conf.d

cp spawn-fcgi spawn-fcgi.mapserv
Open the configuration file and change the socket to a path where the socket can reside and be used. The actual socket will have a dash and number automatically appended.
/etc/conf.d/spawn-fcgi.mapserv# FCGI_SOCKET=
FCGI_SOCKET=/var/run/mapserv.sock
The address and port must be disabled by setting them to blank/empty so the socket can be used.
/etc/conf.d/spawn-fcgi.mapserv# FCGI_ADDRESS=127.0.0.1
FCGI_ADDRESS=

# FCGI_PORT=1234
FCGI_PORT=
Set the fgci program path to the full path of the mapserv cgi/executable file on your system. If installed from source code, this may be /usr/local/bin/mapserv .
/etc/conf.d/spawn-fcgi.mapserv#FCGI_PROGRAM=/usr/bin/php-cgi
FCGI_PROGRAM=/usr/bin/mapserv
Set the fast-cgi user/group to the same as the webserver.
/etc/conf.d/spawn-fcgi.mapservFCGI_USER=nginx
FCGI_GROUP=nginx
/etc/init.d/spawn-fcgi.mapserv start

ls -la /var/run/mapserv.sock*
If you want to always start the daemon at boot, add to openrc (or your system's daemon manager).
rc-update add spawn-fcgi.mapserv default
/etc/nginx/nginx.conf		location ~ ^/mapserv$ {
			gzip           off;
			root           /usr/bin; # path to directory with mapserv cgi/executable
			fastcgi_pass   unix:/var/run/mapserv.sock-1; # path of mapserv fcgi socket
			# include      fastcgi_params;
			fastcgi_param  QUERY_STRING       $query_string;
			fastcgi_param  REQUEST_METHOD     $request_method;
			fastcgi_param  CONTENT_TYPE       $content_type;
			fastcgi_param  CONTENT_LENGTH     $content_length;

			fastcgi_param  SCRIPT_FILENAME    $document_root$fastcgi_script_name;
			fastcgi_param  SCRIPT_NAME        $fastcgi_script_name;
			fastcgi_param  REQUEST_URI        $request_uri;
			fastcgi_param  DOCUMENT_URI       $document_uri;
			fastcgi_param  DOCUMENT_ROOT      $document_root;
			fastcgi_param  SERVER_PROTOCOL    $server_protocol;

			fastcgi_param  GATEWAY_INTERFACE  CGI/1.1;
			fastcgi_param  SERVER_SOFTWARE    nginx/$nginx_version;

			fastcgi_param  REMOTE_ADDR        $remote_addr;
			fastcgi_param  REMOTE_PORT        $remote_port;
			fastcgi_param  SERVER_ADDR        $server_addr;
			fastcgi_param  SERVER_PORT        $server_port;

			# According to RFC3875 (https://tools.ietf.org/html/rfc3875#section-4.1.14) in SERVER_NAME
			# we should put actual hostname user came to. For nginx it is in $host
			# This will allow to run multihost instances
			fastcgi_param  SERVER_NAME        $host;
		}
The "~ ^/mapserv$" regex comparison catches all page requests ending with "/mapserv", excluding GET parameters.
If the executable is "mapserv.cgi", change the comparison here to "~ ^/mapserv.cgi$ {" and future http requests to "/mapserv.cgi?".
/etc/init.d/spawn-fcgi.mapserv restart
Ensure nginx gets the new configuration loaded.
/etc/init.d/nginx restart
Go to your favourite gui webbrowser and try to view the map. Edit "localhost" to your domain if not accessing via localhost.
links http://localhost/mapserv
This will give an error (ie, "No query information to decode. QUERY_STRING is set, but empty.") because, like running mapserv from the command line, it needs to know which map to use and the mode.
Add GET parameters for "map" to match the location of your shapefile mapfile, and "mode" to be "map". And edit the first "localhost" to you domain, if needed.
links http://localhost/mapserv?map=/var/www/localhost/mapserver/shapefile.map&mode=map
The map should now be visible. If using the land borders map, it will show black lines for the land borders between nations on a white background.
To host a simple raster(image) source for mapserver requires the same process as in the Mapserver Shapefile CGI section, but with the following changes.
/var/www/localhost/mapserver/raster.mapMAP
	NAME "World"
	STATUS ON
	SIZE 800 400
	EXTENT -180 -90 180 90
	SHAPEPATH "."
	#
	# Start of layer definitions
	#
	LAYER
		NAME "topo-bath"
		TYPE RASTER
		EXTENT -180 -90 180 90
		STATUS DEFAULT
		DATA "world.topo.bathy.200401.3x5400x2700.png"
	END # LAYER
END # MAP
With line by line comments:
/var/www/localhost/mapserver/raster.mapMAP
NAME "World" # Name used to refer to aggregate map layer sent to client
STATUS ON # show this map, but client can turn off.
SIZE 800 400 # size of image to send to requesting clients
EXTENT -180 -90 180 90 # dimensions source data represents, need for MAP and LAYER
SHAPEPATH "." # relative path to directory containing the raster/image file from this mapfile's directory
#
# Start of layer definitions
#
LAYER
NAME "topo-bath" # name of layer in map, topography-bathymetry image raster layer
TYPE RASTER # type of data is raster/image
EXTENT -180 -90 180 90 # dimensions source data represents, need for MAP and LAYER
STATUS DEFAULT # always display this layer when this MAP is requested
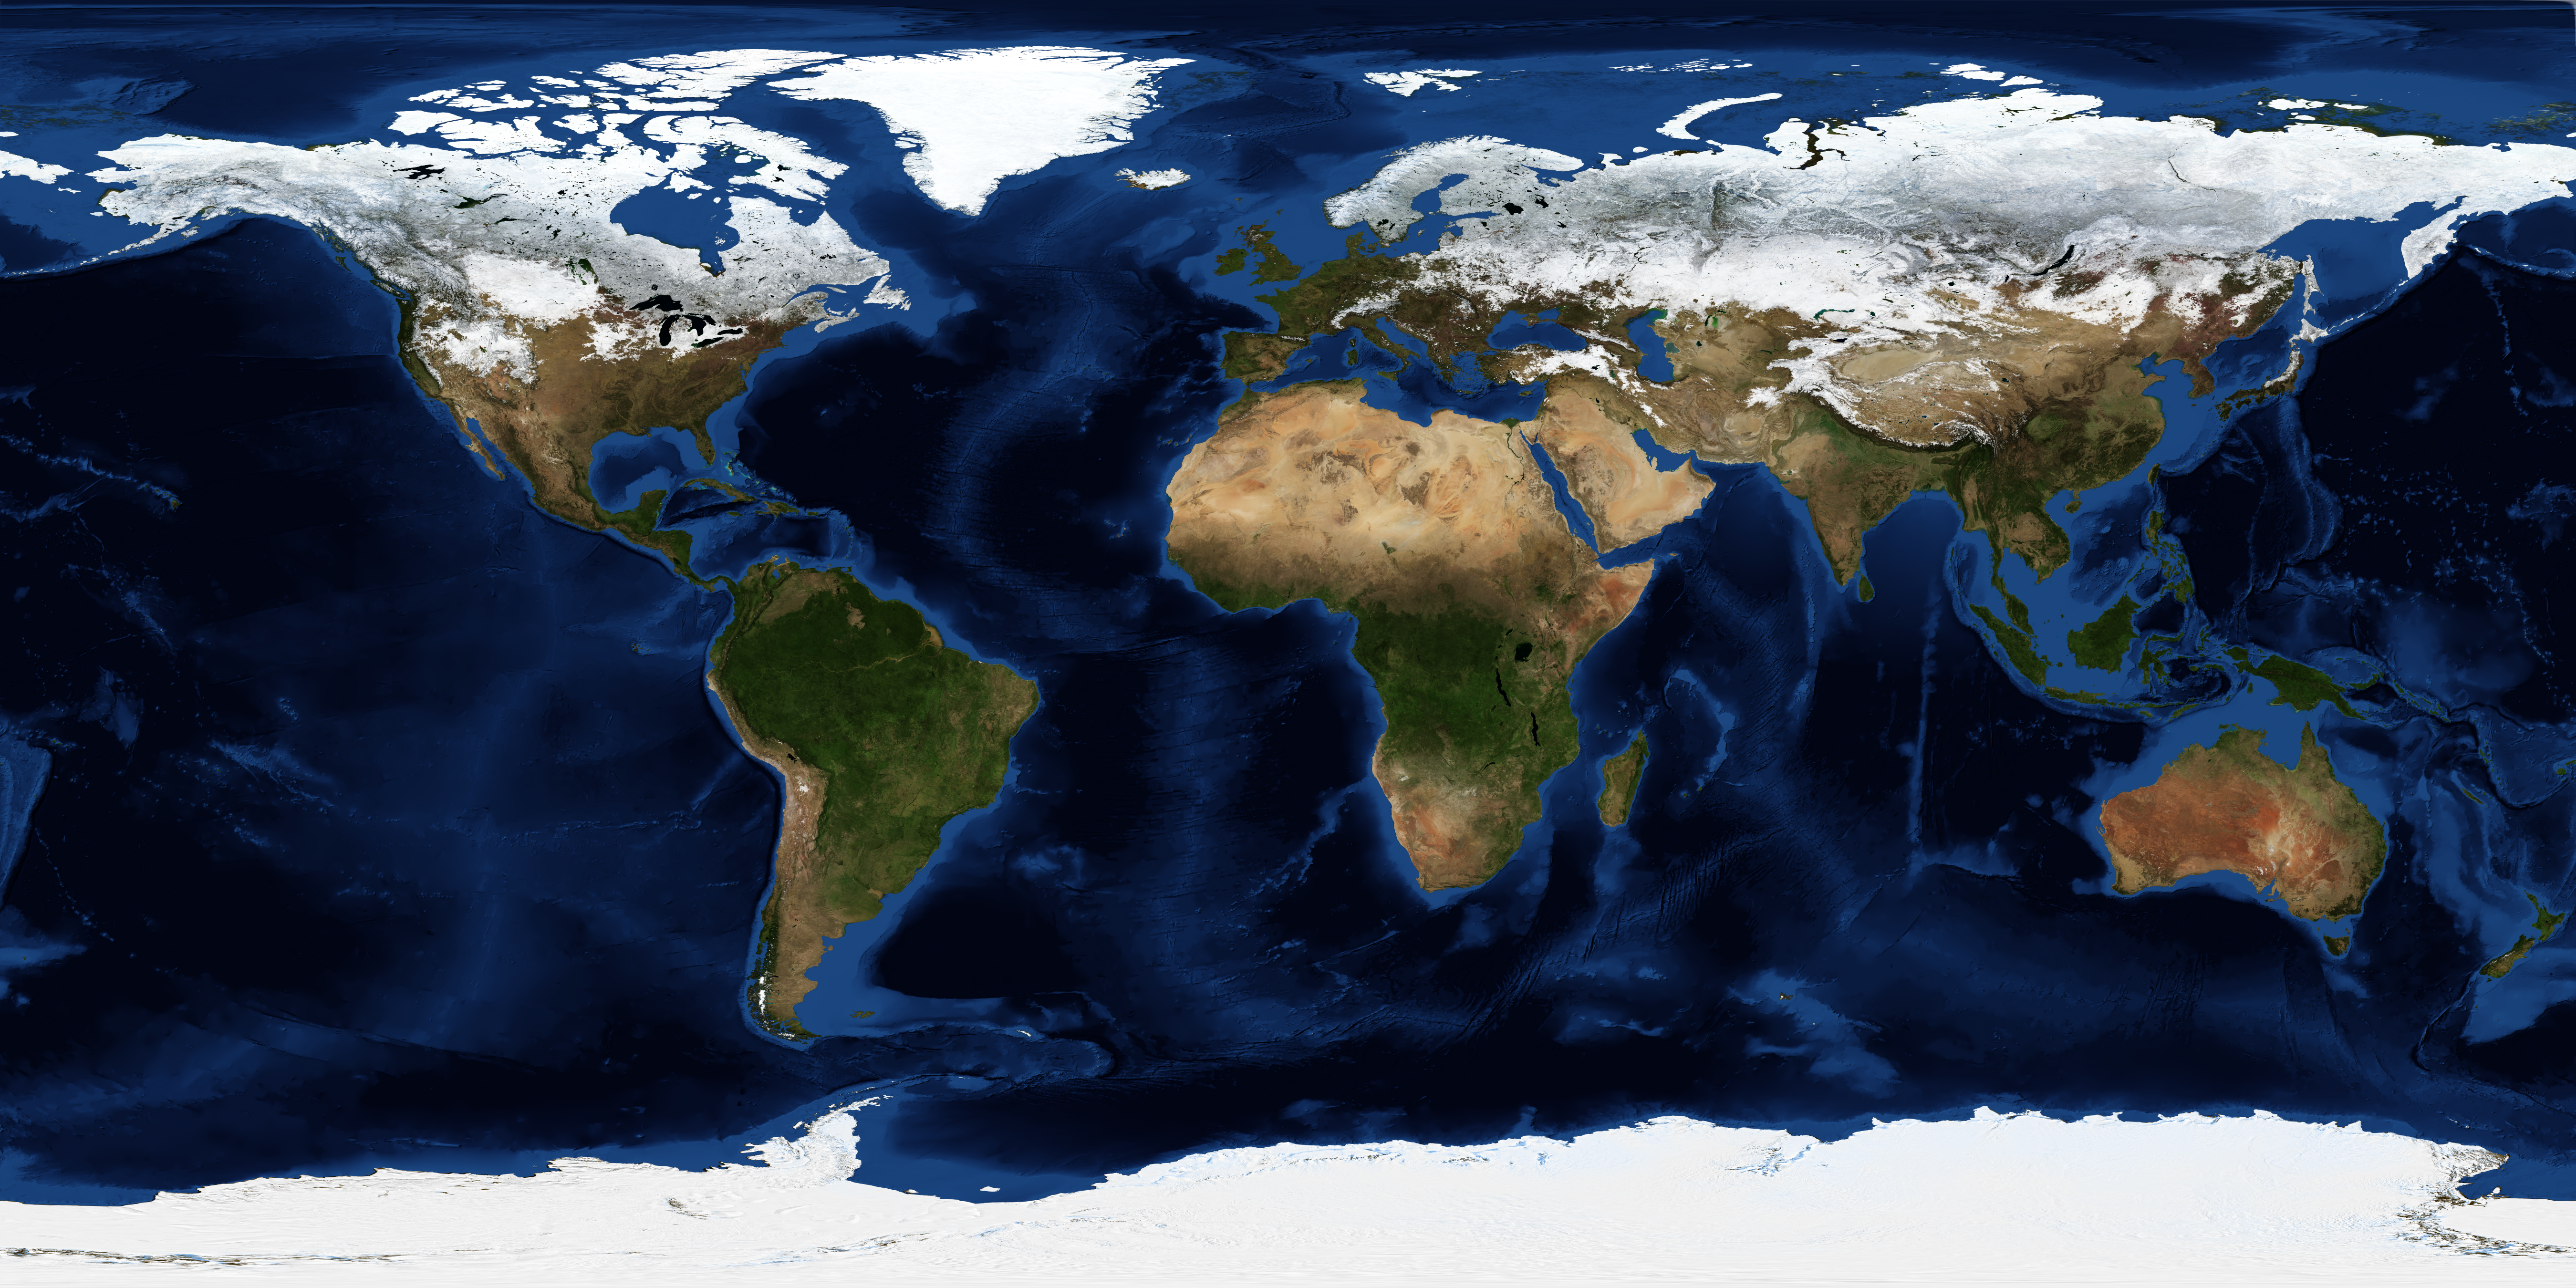
DATA "world.topo.bathy.200401.3x5400x2700.png" # name of the raster/image file
END # LAYER
END # MAP
mapserv -nh "QUERY_STRING=map=/var/www/localhost/mapserver/raster.map&mode=map" > rastertest.png
The rastertest.png file will contain a smaller, lower-resolution copy of the original Blue Marble image.
/etc/init.d/spawn-fcgi.mapserv start

/etc/init.d/nginx start
Test the raster mapfile with your server by going to the link below, changing the (first) localhost to your domain and the mapfile path for your system.
links http://localhost/mapserv?map=/var/www/localhost/mapserver/raster.map&mode=map
This guide assumes use of PostgreSQL 9.4 and PostGIS 2.1.
emerge -vDuNtp postgis

emerge -vDuN postgis
su postgres

postgres -D /var/lib/postgres-9.4/data
To start postgresql/postgis as a background server.
/etc/init.d/postgresql-9.4 start
To add a daemon so postgresql/postgis is always available.
rc-update add postgresql-9.4 default
The default configuration for PostgreSQL may allow all local connections to require no password.
To secure the system, edit the /etc/postgresql-9.4/pg_hba.conf file so METHOD for connections requires passwords, as described in the file.
Note: set the "postgres" ROLE password to avoid getting locked out of PostgreSQL after passwords are required.
su postgres

psql
CREATE DATABASE mapdb;

\c mapdb

CREATE EXTENSION postgis;
CREATE USER mapuser;

ALTER ROLE mapuser WITH PASSWORD 'secretpassword';

ALTER DATABASE mapdb OWNER TO mapuser;

\q
exit
psql mapdb mapuser
Create a new table for storing points on Earth.
CREATE TABLE global_points (

id SERIAL PRIMARY KEY,

name VARCHAR(64),

location GEOGRAPHY(POINT,4326)

);
Add some locations to the table, using the "4326" spheroid model of Earth's shape and each (longitude latitude) in decimal degrees.
INSERT INTO global_points (name, location)

VALUES ('Panama', STraphyFromText('SRID=4326;POINT(-79.5 9)') );

INSERT INTO global_points (name, location)

VALUES ('Forest', STraphyFromText('SRID=4326;POINT(-79.5 51.5)') );

INSERT INTO global_points (name, location)

VALUES ('London', STraphyFromText('SRID=4326;POINT(-0.1 51.5)') );
Create an index for each location's position.
CREATE INDEX global_points_gix ON global_points USING GIST ( location );
Now simple queries of the data can be executed.
CREATE VIEW global_points_geom AS

SELECT *, location::geometry AS location_geom

FROM global_points;
/var/www/localhost/mapserver/postgis.mapMAP
	NAME "World"
	STATUS ON
	SIZE 800 400
	EXTENT -180 -90 180 90
	UNITS DD
	SHAPEPATH "."
	FONTSET ./fonts.txt
	SYMBOLSET "./symbols.txt"
	#
	# Start of layer definitions
	#
	# raster/image layer of world, flattened
	LAYER
		EXTENT -180 -90 180 90
		NAME "topo-bath"
		TYPE RASTER
		STATUS DEFAULT
		DATA "world.topo.bathy.200401.3x5400x2700.png"
	END # LAYER
	#
	# points to add to map, taken from postgis database
	LAYER
		EXTENT -180 -90 180 90
		CONNECTIONTYPE POSTGIS
		NAME "worldpoints"
		CONNECTION "host=127.0.0.1 dbname=mapdb user=mapuser password=secretpassword"
		PROCESSING "CLOSE_CONNECTION=DEFER"
		DATA "location_geom from global_points_geom using srid=4326 using unique id"
		LABELITEM "name"
		STATUS DEFAULT
		TYPE POINT
		CLASS
			NAME "placedot"
			STYLE
				SYMBOL 'circle'
				OUTLINECOLOR 255 0 0
				SIZE 10
				COLOR 0 255 0
			END # STYLE
			LABEL
				FONT "arial"
				TYPE truetype
				SIZE 12
				POSITION LC
				COLOR  255 0 0
				OUTLINECOLOR 0 0 0
			END # LABEL
 		END # CLASS
	END # LAYER
END # MAP
With comments explaining each line
/var/www/localhost/mapserver/postgis.mapMAP
	NAME "World" # Name used to refer to aggregate map layer sent to client
	STATUS ON # show this map, but client can turn off.
	SIZE 800 400 # size of image to send to requesting clients
	EXTENT -180 -90 180 90 # dimensions source data represents, need for MAP and LAYER
	UNITS DD # units used for scale bar and scaling/zoom
	SHAPEPATH "." # path to directory containing the raster/image file
	FONTSET "./fonts.txt" # path to fonts file, needed for drawing labels onto map
	SYMBOLSET "./symbols.txt" # path to symbols file, needed for drawing points or pictures onto map
	#
	# Start of layer definitions
	#
	# raster/image layer of world, flattened
	LAYER
		EXTENT -180 -90 180 90 # dimensions source data represents, need for MAP and LAYER
		NAME "topo-bath" # name of layer in map, topography-bathymetry image raster layer
		TYPE RASTER # type of data is raster/image
		STATUS DEFAULT # "always display" when this MAP is requested
		DATA "world.topo.bathy.200401.3x5400x2700.png" # name of the raster/image file
	END # LAYER
	#
	# points to add to map, taken from postgis database
	LAYER
		EXTENT -180 -90 180 90 # dimensions source data represents, need for MAP and LAYER
		CONNECTIONTYPE POSTGIS # connect to PostgreSQL/PostGIS database
		NAME "worldpoints" # name of layer in map
		CONNECTION "host=127.0.0.1 dbname=mapdb user=mapuser password=secretpassword" # Connect to a local (or remote) spatial database, edit user, dbname and host as needed
		PROCESSING "CLOSE_CONNECTION=DEFER" # keep connection alive for this mapfile, instead of slow reconnection for each layer
		DATA "location_geom from global_points_geom using srid=4326 using unique id" # Get the points from the ’location_geom’ field of the ’global_points_geom’ VIEW (type casts table 'global_points' field 'location' to "GEOMETRY" type). "srid=4326" means use 4326 spheroid shape of Earth. PRIMARY KEY (unique) is "id".
		LABELITEM "name" # name of field for displaying as label on the map/layer with each point
		STATUS DEFAULT # "always display"
		TYPE POINT # layer displays points (name labels are extras with points)
		CLASS
			NAME "placedot" # unimportant
			STYLE # style for dot/line/polygon to display
				SYMBOL 'circle' # name of symbol, find SYMBOL with this NAME
				OUTLINECOLOR 255 0 0 # outer line/border RGB colour for circle
				SIZE 10 # size of circle
				COLOR 0 255 0 # inner RGB color for circle
			END # STYLE
			LABEL # style for label/name to display near point
				FONT "arial" # font used for label, MUST exist in FONT file included above and the font must exist in the system
				TYPE truetype # truetype or bitmap. Truetype is prettier
				SIZE 12 # size of label letters
				POSITION LC # position of label relative to dot/point. "POSITION [upper-lower][left-right]" where "LC" = "lower,center"
				COLOR  255 0 0 # main colour of letters
				OUTLINECOLOR 0 0 0 # colour of outline around each letter
			END # LABEL
 		END # CLASS
	END # LAYER
END # MAP
This map has two layers, a picture of Earth layer overlayed with points of interest. The points of interest rely on FONTSET and SYMBOLSET files. An error in those files will prevent the mapfile from working. See below for samples of these files.
/var/www/localhost/mapserver/symbols.txtSYMBOLSET
	SYMBOL
		NAME "circle" # name used to refer to this symbol in a mapfile
		TYPE ellipse # ellipsde shape
		FILLED true # middle/most of circle is opaque and not transparent
		POINTS # reference points for shape/rotation/position of ellipse
			1 1 # x y of radius, make equal for a circle. Actual size of circle determined in mapfile's STYLE's SIZE.
		END # POINTS
	END # SYMBOL
END # SYMBOLSET
/var/www/localhost/mapserver/fonts.txtverdana	/usr/share/fonts/corefonts/verdana.ttf
times	/usr/share/fonts/corefonts/times.ttf
arial	/usr/share/fonts/corefonts/arial.ttf
To look up what fonts are available on your system and where, use "find" or another file search tool.
find / -name *.ttf
links http://localhost/mapserv?map=/var/www/localhost/mapserver/postgis.map&mode=map
To make a shapefile map available via WMS requires several additions to the mapfile and a minor addition to the nginx configuration file.
/var/www/localhost/mapserver/wms.mapMAP
	NAME "Nations"
	PROJECTION # All Natural Earth data use the Geographic coordinate system (projection), WGS84 datum +proj=longlat +ellps=WGS84 +datum=WGS84 +no_defs # Natural Earth data seems to be EPSG:4326
		"init=epsg:4326" # Natural Earth data seems to be EPSG:4326
	END # PROJECTION
	STATUS ON
	EXTENT -180 -90 180 90
	UNITS DD
	SHAPEPATH "." # where the spapefile or raster data is located
	IMAGECOLOR 255 255 255
	#
	# Start of web interface definition
	#
	WEB
		METADATA
			wms_title "Word Borders"
			wms_onlineresource "http://localhost/mapserv?map=/var/www/localhost/mapserver/wms.map&"
			# wms_srs (unless PROJECTION object is defined using “init=epsg:...”)
			wms_enable_request "GetCapabilities GetMap GetLegendGraphic"
		END # METADATA
		IMAGEPATH "/var/www/localhost/mapserver_tmp/"
		IMAGEURL "/wmst/"
	END # WEB
	#
	# Start of layer definitions
	#
	LAYER
		NAME "ne_110m_admin_0_boundary_lines_land"
		PROJECTION
			"init=epsg:4326"
		END # PROJECTION
		METADATA
			"wms_srs" "EPSG:4326" # optional tag since inherits MAP level's wms_srs
			"wms_name" "land boundaries"
			"wms_server_version" "1.1.1"
			"wms_format" "image/png"
		END # METADATA
		STATUS ON
		DATA ne_110m_admin_0_boundary_lines_land
		TYPE LINE # TYPE POLYGON
		CLASS
			NAME 'provinceboundaries'
			STYLE
				OUTLINECOLOR 0 0 0
				SIZE       1
			END # STYLE
		END # CLASS
	END # LAYER
END # MAP
With comments explaining each line
/var/www/localhost/mapserver/wms.mapMAP
	NAME "Nations" # name for the aggregate layer output to the client as images/tiles
	PROJECTION # All Natural Earth data use the Geographic coordinate system (projection), WGS84 datum +proj=longlat +ellps=WGS84 +datum=WGS84 +no_defs
		"init=epsg:4326" # Natural Earth data coresponds to "EPSG:4326" projection type, using "init=" means allows skipping "wms_srs" below
	END # PROJECTION
	STATUS ON # show lines of this map
	EXTENT -180 -90 180 90 # range of coordinates of WMS requests allowed.
	UNITS DD # units for scalebar and scaling/zoom, eg "DD" decimal degrees, not visible in this simple demo, maybe visible with Cesium
	SHAPEPATH "." # where directory with the spapefile or raster data is located, relative to this file
	IMAGECOLOR 255 255 255 # background color of images/tiles output
	#
	# Start of web interface definition
	#
	WEB
		METADATA
			wms_title "Word Borders" # name for the map, can have spaces
			wms_onlineresource "http://localhost/mapserv?map=/var/www/localhost/mapserver/wms.map&" # link/url to your mapserver cgi with "map=" to your wms mapfile and MUST end with "&", OR can end at "?" if your "map=" part is hidden and carefully appended by nginx or a cgi wrapper
			# wms_srs is unneeded unless PROJECTION object is defined using “init=epsg:...”
			wms_enable_request "GetCapabilities GetMap GetLegendGraphic" # default is nothing enabled. Must enable some to make wms mapserver usable # possibilities: {GetCapabilities GetMap GetFeatureInfo GetLegendGraphic}
		END # METADATA
		IMAGEPATH "/var/www/localhost/mapserver_tmp/" # full path of directory on server to place the images/tiles to be sent to client (eg, /var/www/localhost/mapserver_tmp/nameofimage)
		IMAGEURL "/wmst/" # url / path within the domain for client to use to get images/tiles from IMAGEPATH (eg, http://domain.com/wmst/nameofimage)
	END # WEB
	#
	# Start of layer definitions
	#
	LAYER
		NAME "ne_110m_admin_0_boundary_lines_land" # name (no spaces) for specific layer within this mapfile. Can be multiple layers per mapfile.p
		PROJECTION # All Natural Earth data use the Geographic coordinate system (projection), WGS84 datum +proj=longlat +ellps=WGS84 +datum=WGS84 +no_defs
			"init=epsg:4326" # Natural Earth data coresponds to "EPSG:4326" projection type, using "init=" means allows skipping "wms_srs" below
		END # PROJECTION
		METADATA
			"wms_srs" "EPSG:4326" # optional tag since inherits MAP level's wms_srs
			"wms_name" "land boundaries" # name for the map layer, can have spaces
			"wms_server_version" "1.1.1" # This is the older standard. Could use "wms_server_version" "1.3.0"
			"wms_format" "image/png" # Image file type. eg, "image/jpeg"
		END # METADATA
		STATUS DEFAULT # DEFAULT always sent to client, STATUS ON or OFF can be requested by client. Relevant if multiple layers in mapfile.
		DATA ne_110m_admin_0_boundary_lines_land
		TYPE LINE # Kind of shapes data represents. A more simple shape type can be specified than data is stored in. eg, "TYPE LINE" if data is "TYPE POLYGON"
		CLASS
			NAME 'provinceboundaries' # name of "CLASS"/style for this layer
			STYLE # layer drawing characteristics
				OUTLINECOLOR 0 0 0 # colour of border lines drawn
				SIZE       1 # width of border lines drawn
			END # STYLE
		END # CLASS
	END # LAYER
END # MAP
/etc/nginx/nginx.cfg		# for wms mapserver temporary files/tiles
		location /wmst/ {
			alias /var/www/localhost/mapserver_tmp/;
			# using "root" postfixes the location name to end of path. eg, /var/www/localhost/mapserver_tmp/wmst/
		}
The "alias" directory must exist and have permission for read and write by the webserver and fast-cgi daemons' user (nginx).
mkdir /var/www/localhost/mapserver_tmp

chown nginx:nginx /var/www/localhost/mapserver_tmp

chmod 755 /var/www/localhost/mapserver_tmp
/etc/init.d/nginx restart
links http://localhost/mapserv?map=/var/www/localhost/mapserver/wms.map&SERVICE=WMS&VERSION=1.1.1&REQUEST=GetCapabilities
This should give an xml file with information about the wms server, similar to below. It may include ERROR tag messages if there is a configuration issue.
<?xml version='1.0' encoding="UTF-8" standalone="no" ?>
<!DOCTYPE WMT_MS_Capabilities SYSTEM "http://schemas.opengis.net/wms/1.1.1/WMS_MS_Capabilities.dtd"
[
<!ELEMENT VendorSpecificCapabilities EMPTY>
]> <!-- end of DOCTYPE declaration -->
<WMT_MS_Capabilities version="1.1.1">
<!-- MapServer version 7.0.0 OUTPUT=PNG OUTPUT=JPEG SUPPORTS=PROJ SUPPORTS=AGG SUPPORTS=FREETYPE SUPPORTS=CAIRO SUPPORTS=ICONV SUPPORTS=FRIBIDI SUPPORTS=WMS_SERVER SUPPORTS=WFS_SERVER SUPPORTS=WCS_SERVER SUPPORTS=FASTCGI SUPPORTS=GEOS INPUT=JPEG INPUT=POSTGIS INPUT=OGR INPUT=GDAL INPUT=SHAPEFILE -->
<Service>
<Name>OGC:WMS</Name>
<Title>WMS NE2 Provinces</Title>
<OnlineResource xmlns:xlink="http://www.w3.org/1999/xlink" xlink:href="http://localhost/mapserv?map=/var/www/localhost/mapserver/wms.map&"/>
<ContactInformation>
</ContactInformation>
</Service>
<Capability>
<Request>
<GetCapabilities>
<Format>application/vnd.ogc.wms_xml</Format>
<DCPType>
<HTTP>
<Get><OnlineResource xmlns:xlink="http://www.w3.org/1999/xlink" xlink:href="http://localhost/mapserv?map=/var/www/localhost/mapserver/wms.map&"/></Get>
<Post><OnlineResource xmlns:xlink="http://www.w3.org/1999/xlink" xlink:href="http://localhost/mapserv?map=/var/www/localhost/mapserver/wms.map&"/></Post>
</HTTP>
</DCPType>
</GetCapabilities>
<GetMap>
<Format>image/png</Format>
<Format>image/jpeg</Format>
<Format>image/png; mode=8bit</Format>
<Format>application/x-pdf</Format>
<Format>image/svg+xml</Format>
<Format>image/tiff</Format>
<DCPType>
<HTTP>
<Get><OnlineResource xmlns:xlink="http://www.w3.org/1999/xlink" xlink:href="http://localhost/mapserv?map=/var/www/localhost/mapserver/wms.map&"/></Get>
<Post><OnlineResource xmlns:xlink="http://www.w3.org/1999/xlink" xlink:href="http://localhost/mapserv?map=/var/www/localhost/mapserver/wms.map&"/></Post>
</HTTP>
</DCPType>
</GetMap>
<GetLegendGraphic>
<Format>image/png</Format>
<Format>image/jpeg</Format>
<Format>image/png; mode=8bit</Format>
<DCPType>
<HTTP>
<Get><OnlineResource xmlns:xlink="http://www.w3.org/1999/xlink" xlink:href="http://localhost/mapserv?map=/var/www/localhost/mapserver/wms.map&"/></Get>
<Post><OnlineResource xmlns:xlink="http://www.w3.org/1999/xlink" xlink:href="http://localhost/mapserv?map=/var/www/localhost/mapserver/wms.map&"/></Post>
</HTTP>
</DCPType>
</GetLegendGraphic>
</Request>
<Exception>
<Format>application/vnd.ogc.se_xml</Format>
<Format>application/vnd.ogc.se_inimage</Format>
<Format>application/vnd.ogc.se_blank</Format>
</Exception>
<VendorSpecificCapabilities />
<UserDefinedSymbolization SupportSLD="1" UserLayer="0" UserStyle="1" RemoteWFS="0"/>
<Layer>
<Name>nations</Name>
<Title>WMS NE2 Provinces</Title>
<Abstract>nations</Abstract>
<SRS>EPSG:4326</SRS>
<LatLonBoundingBox minx="-180" miny="-90" maxx="180" maxy="90" />
<BoundingBox SRS="EPSG:4326"
minx="-180" miny="-90" maxx="180" maxy="90" />
<Layer queryable="0" opaque="0" cascaded="0">
<Name>ne_110m_admin_0_boundary_lines_land</Name>
<Title>ne_110m_admin_0_boundary_lines_land</Title>
<SRS>EPSG:4326</SRS>
<LatLonBoundingBox minx="-140.998" miny="-54.8968" maxx="141.034" maxy="70.1642" />
<BoundingBox SRS="EPSG:4326"
minx="-140.998" miny="-54.8968" maxx="141.034" maxy="70.1642" />
<Style>
<Name>default</Name>
<Title>default</Title>
<LegendURL width="151" height="23">
<Format>image/png</Format>
<OnlineResource xmlns:xlink="http://www.w3.org/1999/xlink" xlink:type="simple" xlink:href="http://localhost/mapserv?map=/var/www/localhost/mapserver/wms.map&version=1.1.1&service=WMS&request=GetLegendGraphic&layer=ne_110m_admin_0_boundary_lines_land&format=image/png&STYLE=default"/>
</LegendURL>
</Style>
</Layer>
</Layer>
</Capability>
</WMT_MS_Capabilities>
links http://localhost/mapserv?map=/var/www/localhost/mapserver/wms.map&SERVICE=WMS&VERSION=1.1.1&REQUEST=GetMap&LAYERS=Nations&STYLES=&SRS=EPSG:4326&BBOX=-173.537,35.8775,-11.9603,83.8009&WIDTH=400&HEIGHT=300&FORMAT=image/png
You should now see a partial map of North America.
		//comment out the original viewer
		//var viewer = new Cesium.Viewer('cesiumContainer');

		// Add a new WMS type viewer connecting to your WMS server
		// need baseLayerPicker and geocoder as false to prevent pulling in default map layers (Bing)
		var viewer = new Cesium.Viewer('cesiumContainer',{
			imageryProvider : new Cesium.WebMapServiceImageryProvider({
				url : '/mapserv?map=/var/www/localhost/mapserver/wms.map',
				layers : 'Nations'
			}),
			baseLayerPicker : false,
			geocoder : false
		});
links http://localhost/Cesium/Apps/HelloWorld.html